React is a declarative, efficient, and flexible JavaScript library
for building user interfaces.
It lets you compose complex UIs from small and isolated pieces
of code called “components”.
React has a few different kinds of components, first we'll go with
React.Component
You can find an MDN Tutorial Document on React
Here
that may be useful.
Extracts from this are used below...
You can also take a look at w3Schools offering and follow their
React Tutorial (also listed in next pane, Set-up Environment)
"dependencies": { "express": "^4.17.1", "path": "^0.12.7", "react": "^17.0.2", "react-dom": "^17.0.2", "ts-loader": "^9.2.5", "typescript": "^4.3.5", "webpack": "^5.51.1", "webpack-cli": "^4.8.0" }So a package.json file may look like this...
{ "name": "jamming", "version": "0.0.0", "description": "Jamming", "main": "server.js", "author": { "name": "" }, "dependencies": { "express": "^4.17.1", "path": "^0.12.7", "react": "^17.0.2", "react-dom": "^17.0.2", "ts-loader": "^9.2.5", "typescript": "^4.3.5", "webpack": "^5.51.1", "webpack-cli": "^4.8.0" } }The name of the project that this was taken from was called Jamming
In order to learn and test React, you should set up a React Environment on your computer.
The create-react-app is an officially supported way to create React applications.
If you have NPM and Node.js installed, you can create a React application by first
installing the create-react-app.
Install create-react-app by running this command in your terminal:
D:\YourDirectoryToWorkFrom npm install -g create-react-app
When done you can create a React application (named myTestReact)...
D:\YourDirectoryToWorkFrom npx create-react-app mytestreact
It does not like CAPITAL letters in the name (mytestreact NOT MyTestReact).
Then you can log into the folder mytestreact
cd mytestreact
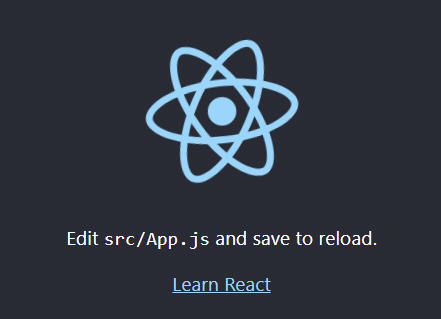
Then to start the React application for your mytestreact do this...
D:\YourDirectoryToWorkFrom npm start
It will open a tab in your browser (it may take a moment)
The above will result in a new directory inside your chosen directory, eg...
D:\YourDirectoryToWorkFrom\mytestreact\src
I created this in my d:\ReactDirectories\CreateReactApp directory.
We use components to tell React what we want to see on the screen.
When our data changes, React will efficiently update and re-render our components.
Here is an example to start with...
class ShoppingList extends React.Component { render() { return ( <div className="shopping-list"> <h1>Shopping List for {this.props.name}</h1> <ul> <li>Instagram</li> <li>WhatsApp</li> <li>Oculus</li> </ul> </div> ); } } // Example usage: <ShoppingList name="Mark" />Here, ShoppingList is a React component class, or React component type.
return React.createElement( 'div', {className: 'shopping-list'}, React.createElement('h1', /* ... h1 children ... */), React.createElement('ul', /* ... ul children ... */) );JSX comes with the full power of JavaScript.
See 'Creating a New React App' document by reactjs.org
Here
Create React App is a comfortable environment for learning React,
and is the best way to start building a new single-page
application in React.
It sets up your development environment so that you can use the
latest JavaScript features, provides a nice developer experience,
and optimizes your app for production.
You’ll need to have Node >= 10.16 and npm >= 5.6 on your machine.
To create a project, run (in Windows Command Prompt):
First log into the directory you want to use
The below will create a new directory there called my-app
npx create-react-app my-app
Say 'y' to install - it may take a few minutes
cd my-app
npm start
Some commands to use from the command propmpt:-
npm start
Starts the development server.
npm run build
Bundles the app into static files for production
npm test
Starts the test runner.
run eject
Removes this tool and copies build dependencies, configuration files
and scripts into the app directory (you cannot go back if you run this).
The examples given in the next pane(s) are taken
from a Tic Tac Toe (Noughts and Crosses) program.
It is basically a 3 x 3 grid...
class Square extends React.Component { render() { return ( <button className="square"> {/*Tells it to render the .sqPos property value - which prints a number in one of the squares. In other words it makes the text of the button be the value of sqPos*/} {this.props.sqPos} </button> ); } } class Board extends React.Component { renderSquare(i) { {/*Let's create/set a property for Square class - giving it a value (i) which will end up in the grid*/} return <Square sqPos={i} />; }
So when the routine has been called properly the end result
would look like
class Square extends React.Component { render() { return ( <button className="square" onClick={function() { alert('click'); }}> {this.props.sqPos} </button> ); } }Or you could use the arrow function (=>)command instead, which is probably the preferred way...
class Square extends React.Component { render() { return ( <button className="square" onClick={() => { alert('click'); }}> {this.props.sqPos} </button> ); } }
Now you can click on a square (it's really a button) and you will get the alert() message on screen.
As a next step, we want the Square component to “remember” that it got clicked,
and fill it with an “X” mark.
To “remember” things, components use state.
See w3Schools comments on
state
React components has a built-in state object.
The state object is where you store property values that belongs to the component.
When the state object changes, the component re-renders.
The state object is initialized in the constructor.
The state object can contain as many properties as you like, eg...
this.state = {
brand: "Ford",
model: "Mustang",
colour: "Red"
};
Let’s store the current value of the Square in this.state, and
change it when the Square is clicked.
First we need to add a constructor to the class to initialize the state:
class Square extends React.Component { constructor(props) { super(props); this.state = { sqPos: null, }; } render() { return ( <button className="square" onClick={() => { alert('click'); }}> {this.props.sqPos} </button> ); } }Note...Setting sqPos: null in the constructor will make all the squares display NULL (blank)...
After setting up the constructor to set the sqPos value to null
we then need to change the render method to change the value when
the button is clicked.
For now I will change it to show an 'X' in the square that was clicked on.
To do this the onClick function (in the 'class square's render section)
needs to be changed to read...
class Square extends React.Component { constructor(props) { super(props); this.state = { sqPos: null, }; } render() { return ( <button className="square" onClick={() => this.setState({sqPos: 'X'})} > {this.state.sqPos} </button> ); } }The this.setState() method is used to change a properties value held in this.state
The React Devtools extension for Chrome lets you inspect a React component
tree with your browser’s developer tools.
Click
Here for download instructions.
Next, to have a complete game, we now need to alternate placing “X”s
and “O”s on the board, and we need a way to determine a winner.
Currently, each Square component maintains the game’s state.
To check for a winner, we’ll maintain the value of each
of the 9 squares in one location.
We may think that Board should just ask each Square for the Square’s state.
Although this approach is possible in React, we discourage it because the
code becomes difficult to understand, susceptible to bugs, and hard to refactor.
Instead, the best approach is to store the game’s state in the parent Board
component instead of in each Square.
The Board component can tell each Square what to display by
passing a prop, just like we did when we passed a number to each Square.
To collect data from multiple children, or to have two child components
communicate with each other, you need to declare the shared state
in their parent component instead.
The parent component can pass the state back down to the children by
using props; this keeps the child components in sync with each
other and with the parent component.
We need to add a constructor to the parent (board class) and tell
it we need a property (called squares which will hold an
array of 9 items (as the board is 9 squares).
We will Null fill it as we want to start with a blank board.
class Board extends React.Component { constructor(props) { super(props); this.state = { squares: Array().fill(null), }; } renderSquare(i) { return <Square sqPos={i} />; } render() { ...more code continues here..As we start to play the game the array, referred to as this.state.squares, could look like, for example...
And then we have to change the renderSquare method
to use the array, as in...
renderSquare(i) {
return <Square sqPos={this.state.squares[i]} />
}
Next, we need to change what happens when a Square is clicked.
The Board component now maintains which squares are filled.
We need to create a way for the Square to update the Board’s state.
Since state is considered to be private to the component that
defines it, we cannot update the Board’s state directly from Square.
Instead, we’ll pass down a function from the Board to the Square, and
we’ll have Square call that function when a square is clicked.
We’ll change the renderSquare method in Board to do this first...
renderSquare(i) {
return (
<Square
sqPos={this.state.squares[i]}
onClick={() => this.handleClick(i)}
/>
);
}
So it will set the value of sqPos to be the current state of this.state.squares[i]
then it will pass down the function that will get called when a square is clicked.
NOTE...
Now we’re passing down two props from Board to Square: sqPos and onClick.
The onClick prop is a function that Square can call when clicked.
The actual function (handleClick) needs to be created inside
Board, below the constructor, and will look like this...
handleClick(i) {
const squares = this.state.squares.slice();
squares[i] = 'X';
this.setState({squares: squares});
}
...the function creates a variable called squares and sets it's
value to be equal to the array "this.state.squares" - not sure if I
need the .slice() but the lesson wants it.
...It then sets the relevant array item in the local squares variable to 'X'.
...Then sets the squares property in this.state
And because now we do not want Square to keep track of the game's state (it's to be
handled in Board instead)
the constructor in Square is no longer needed...and we should render
the values by using this.props.sqPos instead of this.state.sqPos
As well as passing it the function from Boards.
The code so far looks like this...
class Square extends React.Component { render() { return ( <button className="square" onClick={() => this.props.onClick()} > {this.props.sqPos} </button> ); } } class Board extends React.Component { constructor(props) { super(props); this.state = { squares: Array(9).fill(null), }; } handleClick(i) { const squares = this.state.squares.slice(); squares[i] = 'X'; this.setState({squares: squares}); } renderSquare(i) { return ( <Square sqPos={this.state.squares[i]} onClick={() => this.handleClick(i)} /> ); } render() { ....more code below...
In React, function components are a simpler way to write components
that only contain a render method and don’t have their own state.
Instead of defining a class which extends React.Component, we can write a
function that takes props as input and returns what should be rendered.
Function components are less tedious to write than classes, and many
components can be expressed this way.
So we can replace the Square class with this Square function...
function Square(props) {
return (
<button
className="square"
onClick={props.onClick}>
{props.sqPos}
</button>
);
}
Note As props is now a parameter of the function we
do not refer to it as this.props. Instead we would be passing
this.props when we call the function.
So far we are always putting "X" on the board when a square is clicked.
So we need to add code to alternate between "X" and "O" to allow for 2 players.
To do this we are going to add a new property (xIsNext)) to the Board set up
So inside the Board Class where it sets the state we need it to look like...
this.state = {
squares: Array(9).fill(null),
xIsNext: true,
};
And then in the handleClick() function (still in the Board class) we need to
check the new property (xIsNext) to see if we need to display "X" or "O".
Then change the value of xIsNext so the next click will display correctly.
handleClick(i) {
const squares = this.state.squares.slice();
squares[i] = this.state.xIsNext ? 'X' : 'O';
this.setState({
squares: squares,
xIsNext: !this.state.xIsNext,
});
}
The line of code xIsNext: !this.state.xIsNext will change the value of
xIsNext to be true if it is false and vice-versa.
Not wanting to put everything in the overview I'm going to stop there.
The whole code for the game can be seen in...
React/ticTacToe.html
React/ticTacToe.js